Import Existing Statsig Teams
Teams are specific Statsig groups that exist within projects. They are not shared across projects. They also have two possible roles:
Admin and Member.Setup
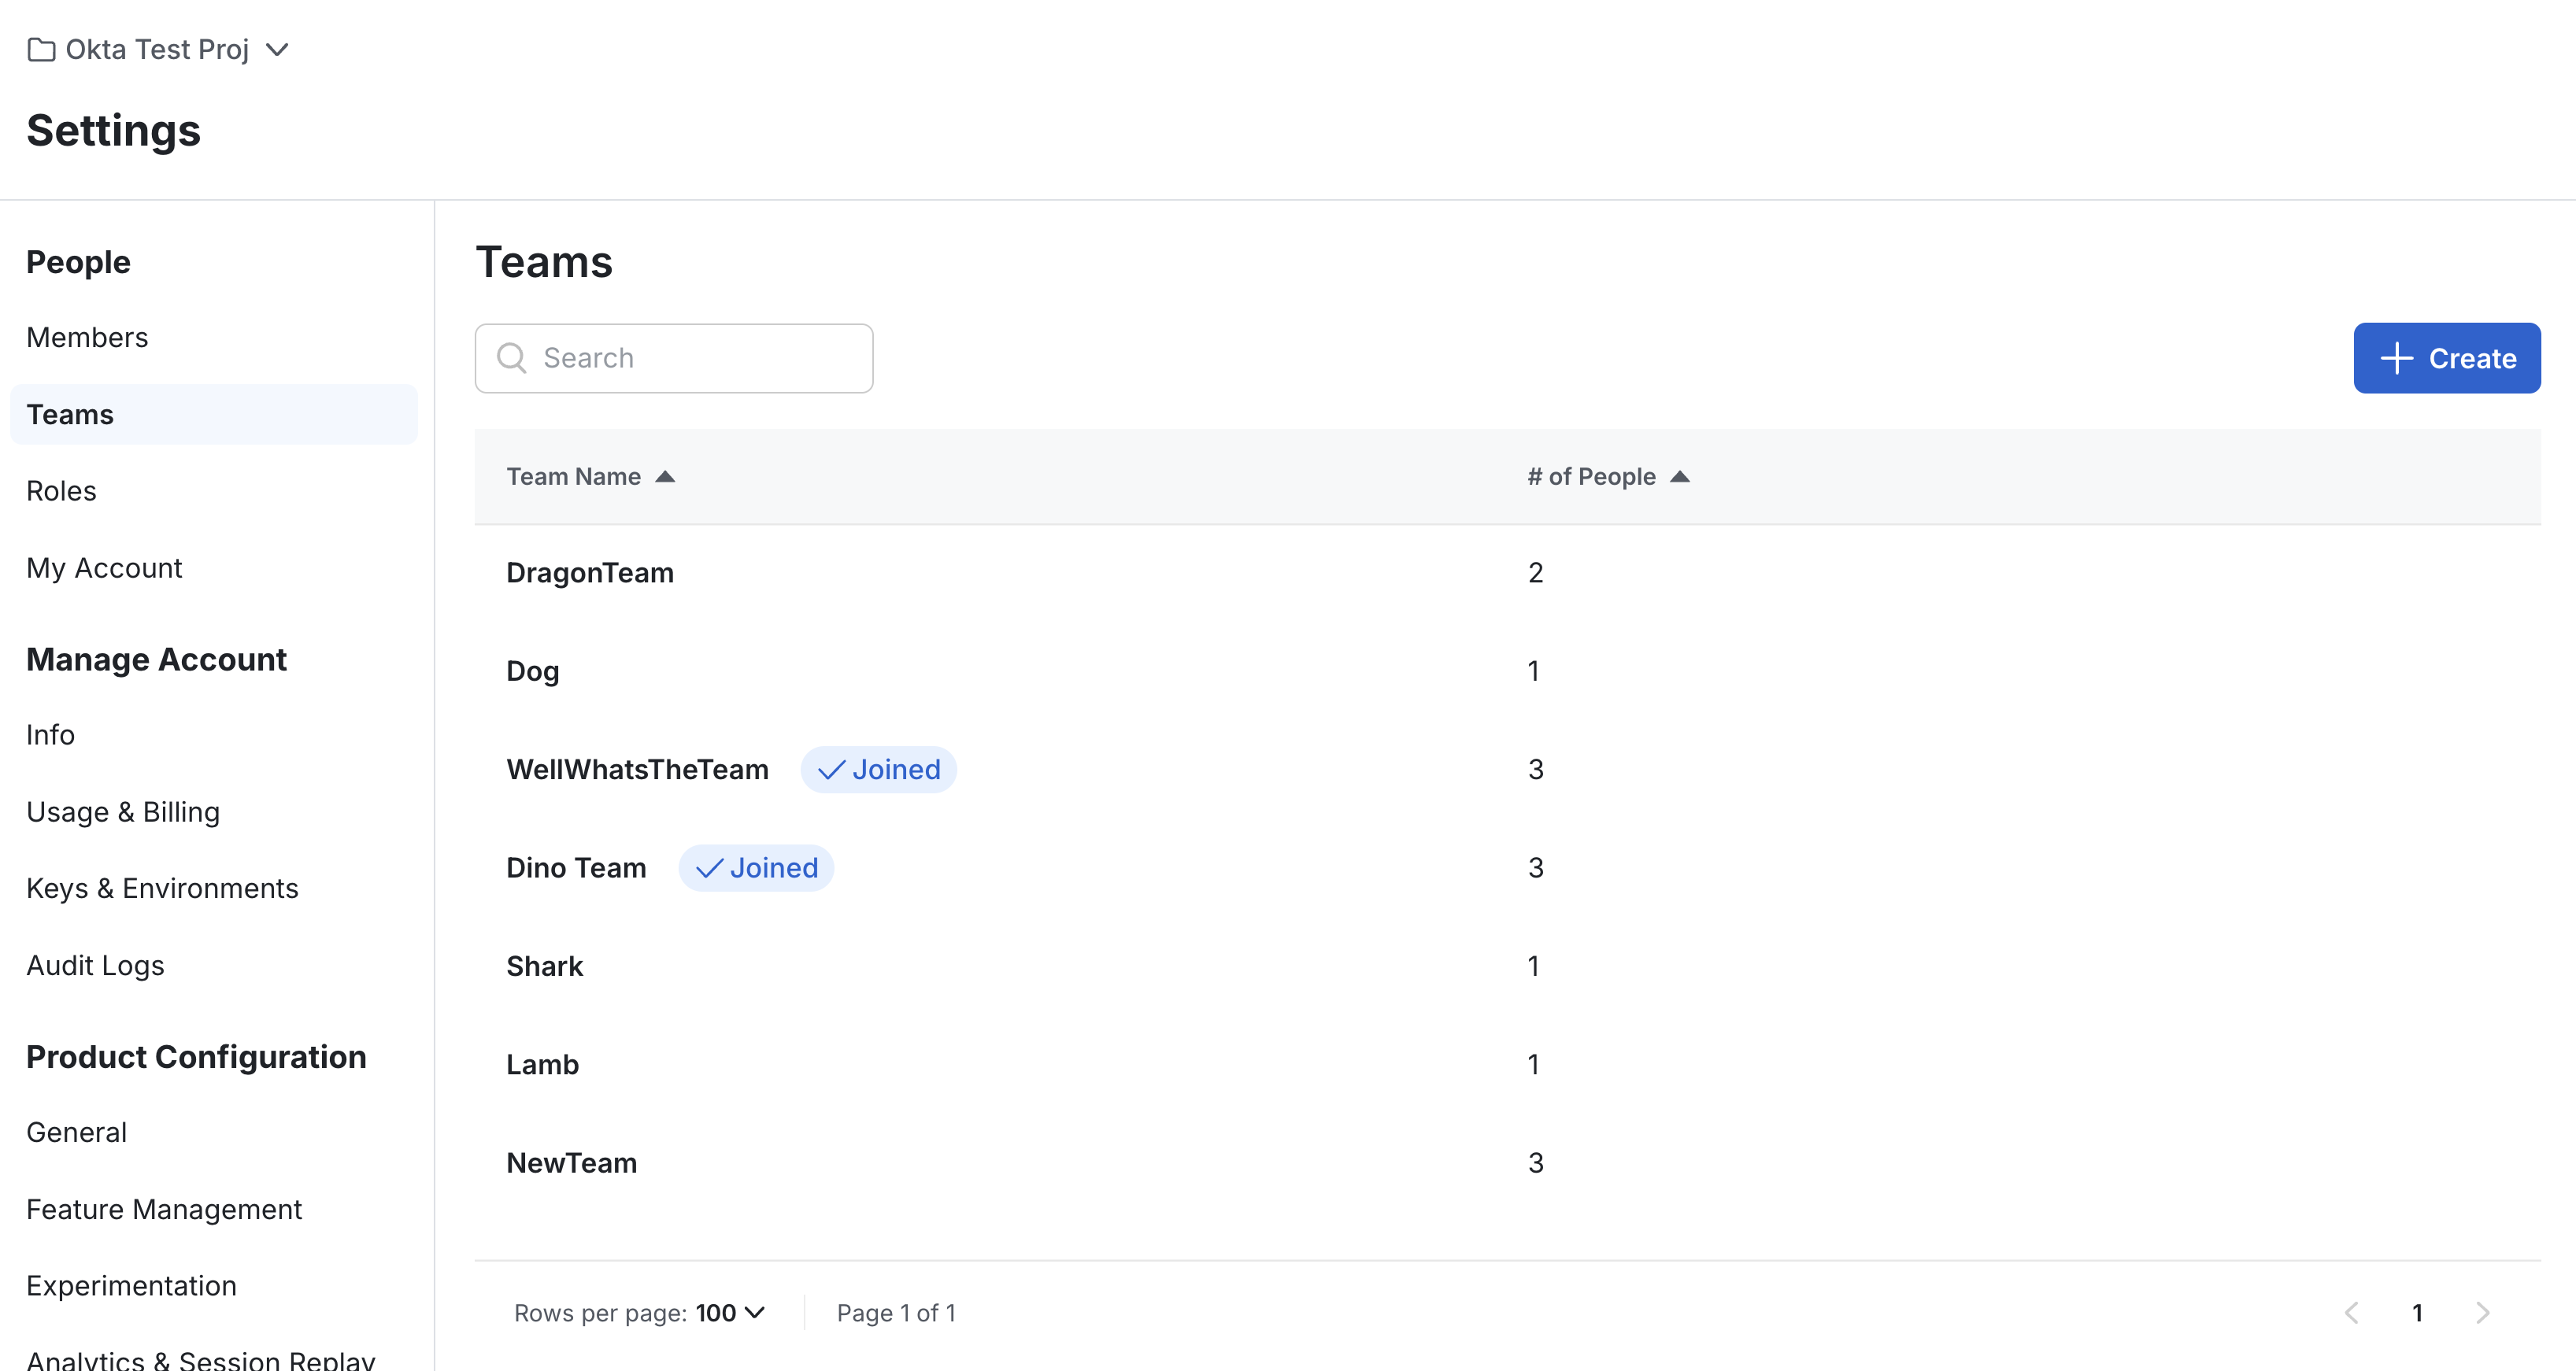
- Ensure you have some teams created in Statsig.
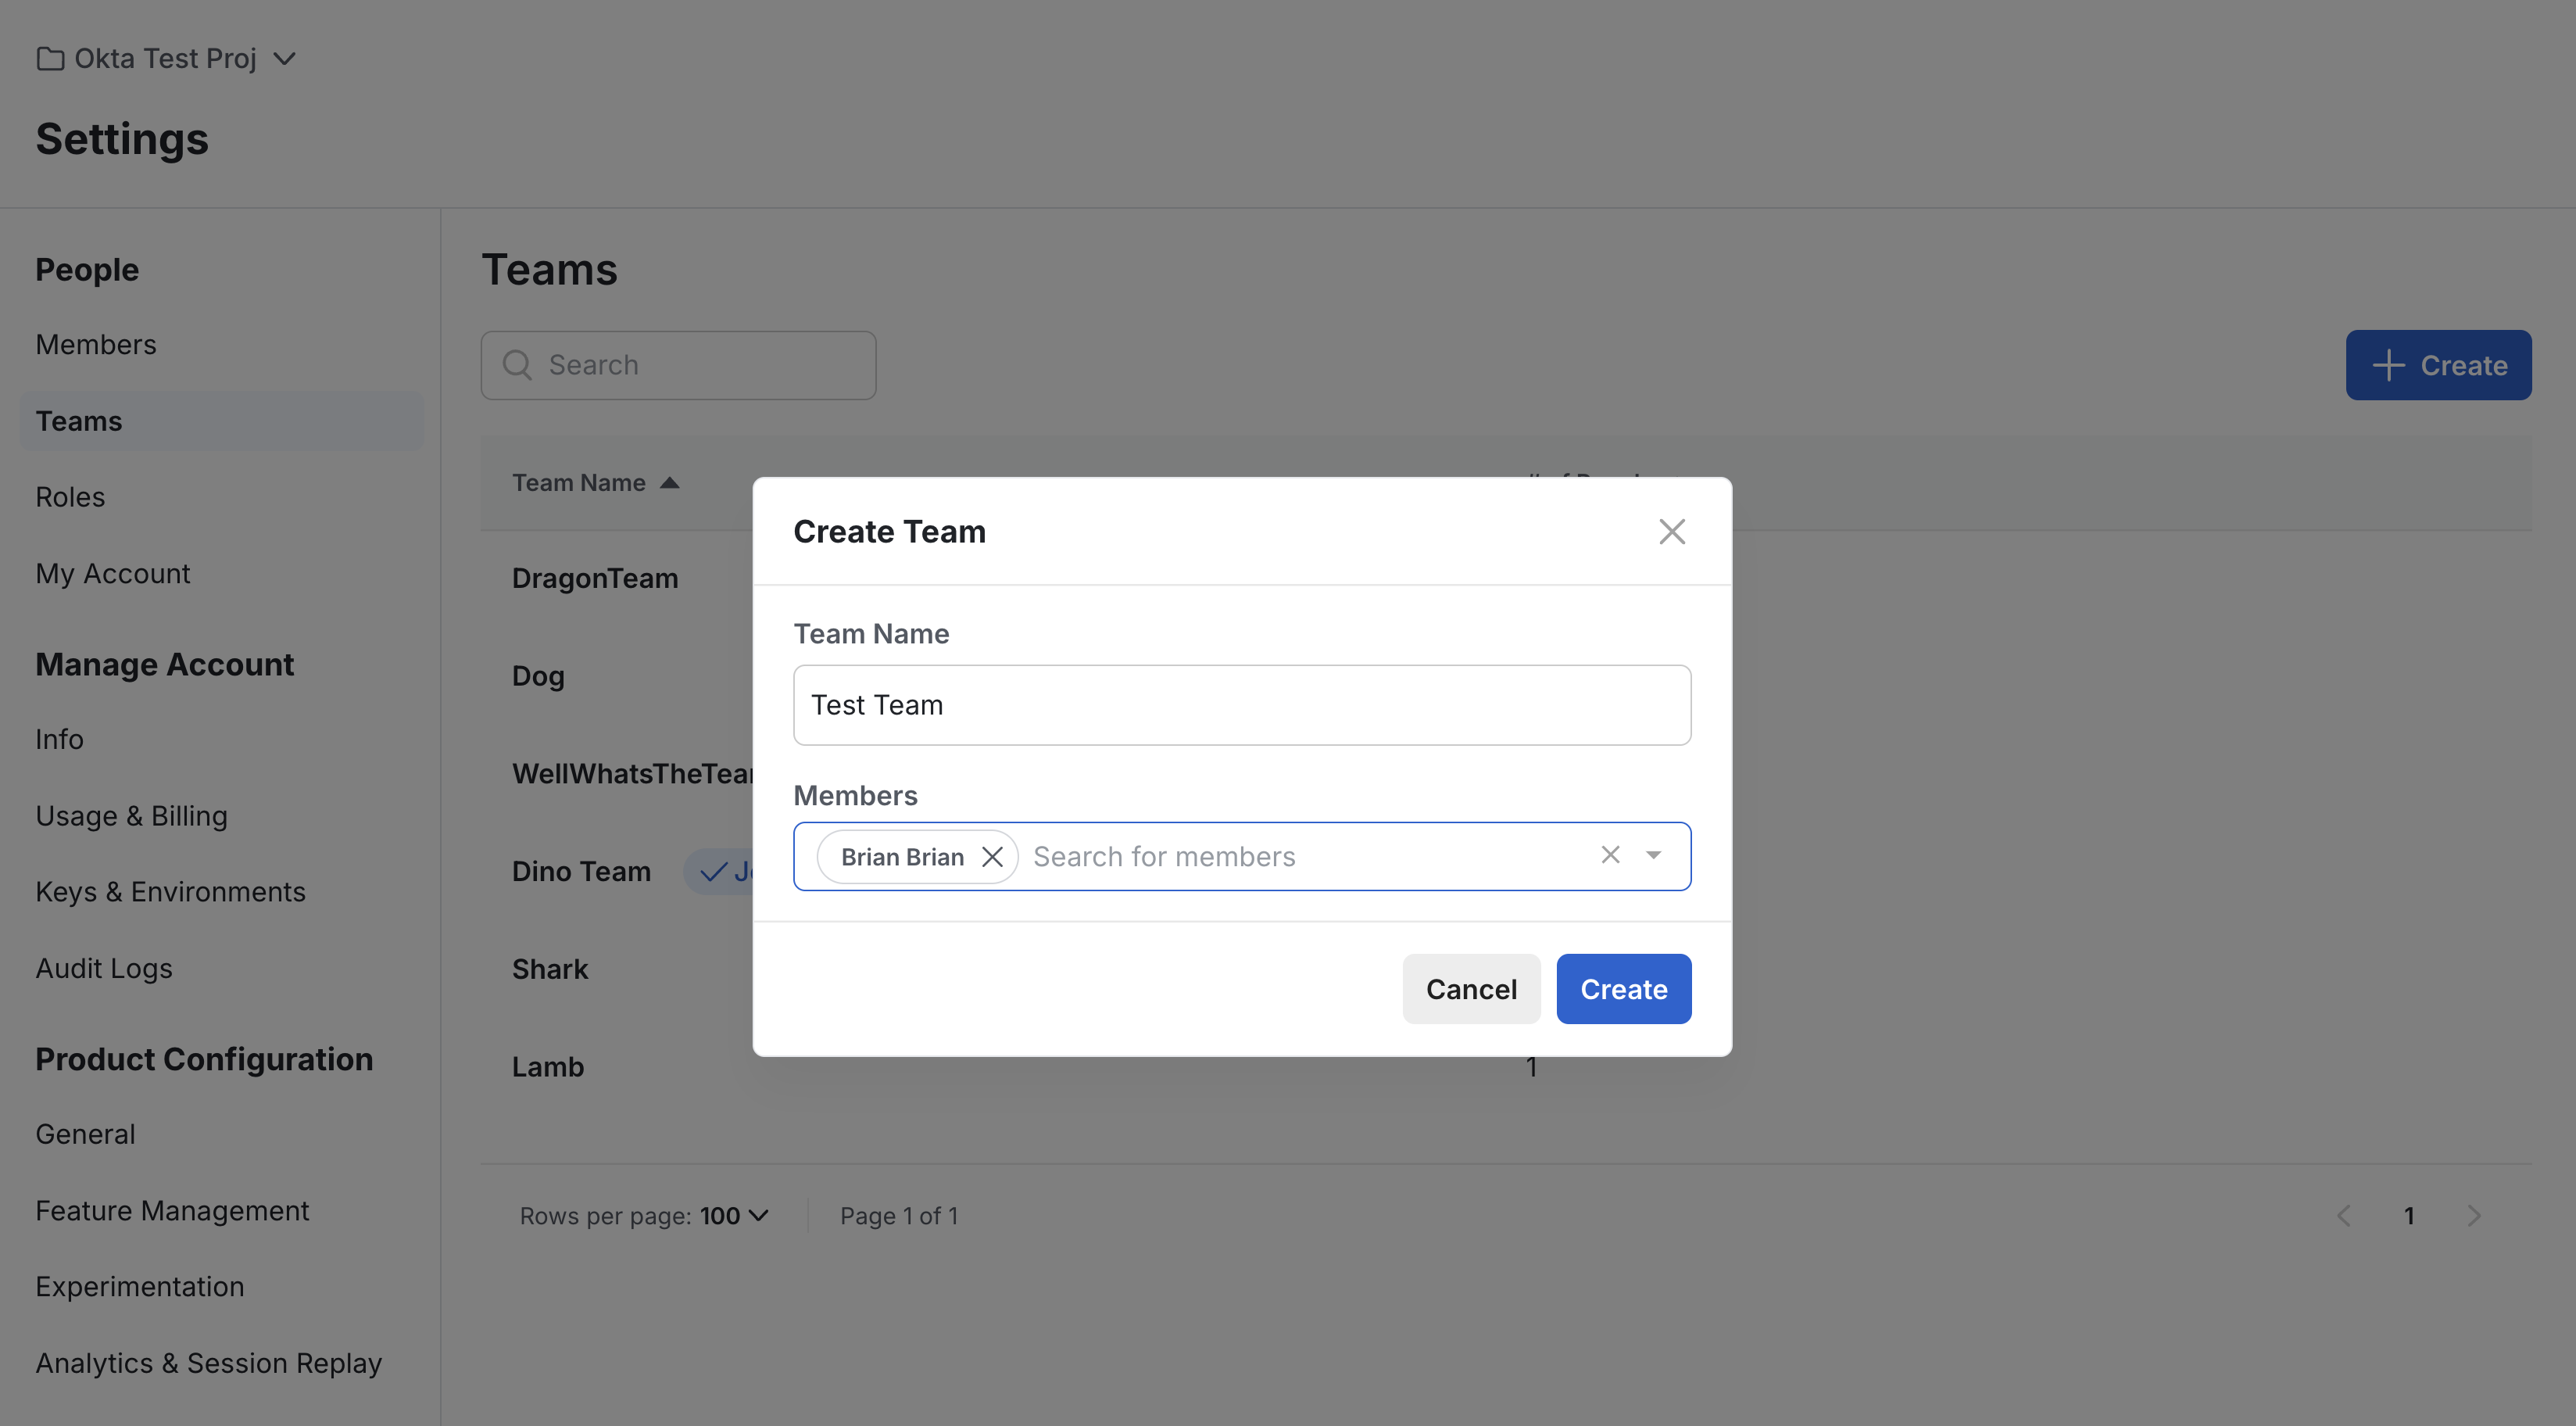
- Navigate to the Statsig Project and create a team if you have none.
Import Existing Groups
- In Okta, go to the Statsig app’s “Import” tab
- Click “Import Now” to fetch existing Statsig users, groups, and teams
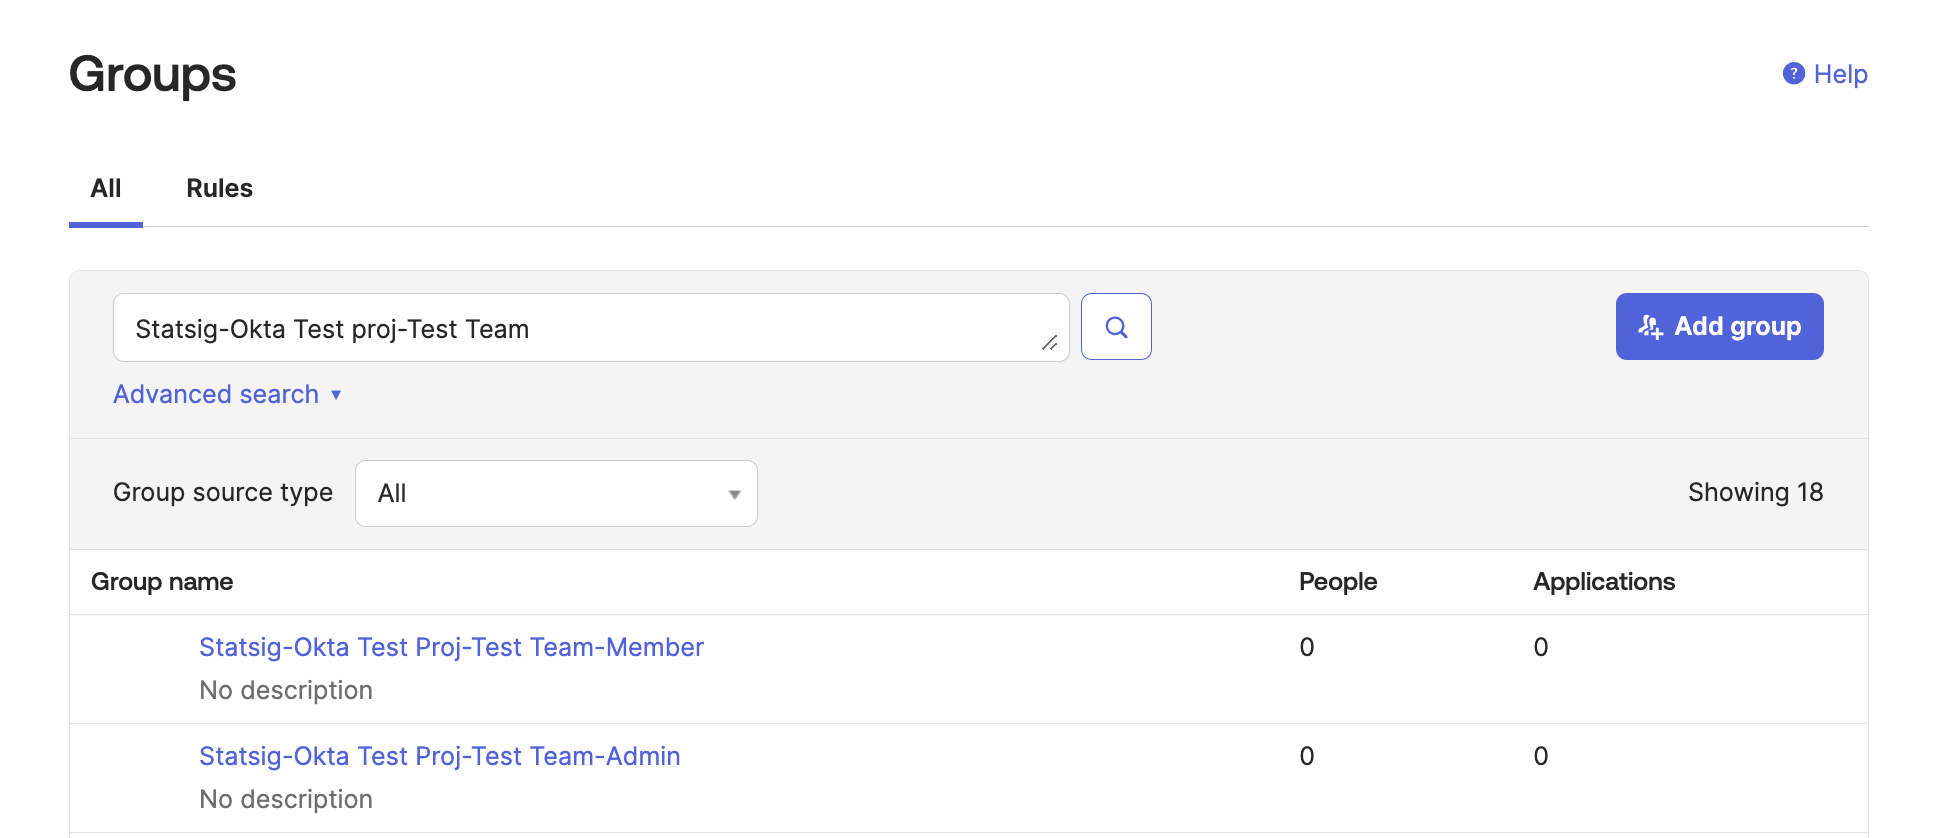
- After importing, you should see the group in your Okta groups following the format
Statsig-ProjectName-TeamName-RoleName.
Create a Mapping Group
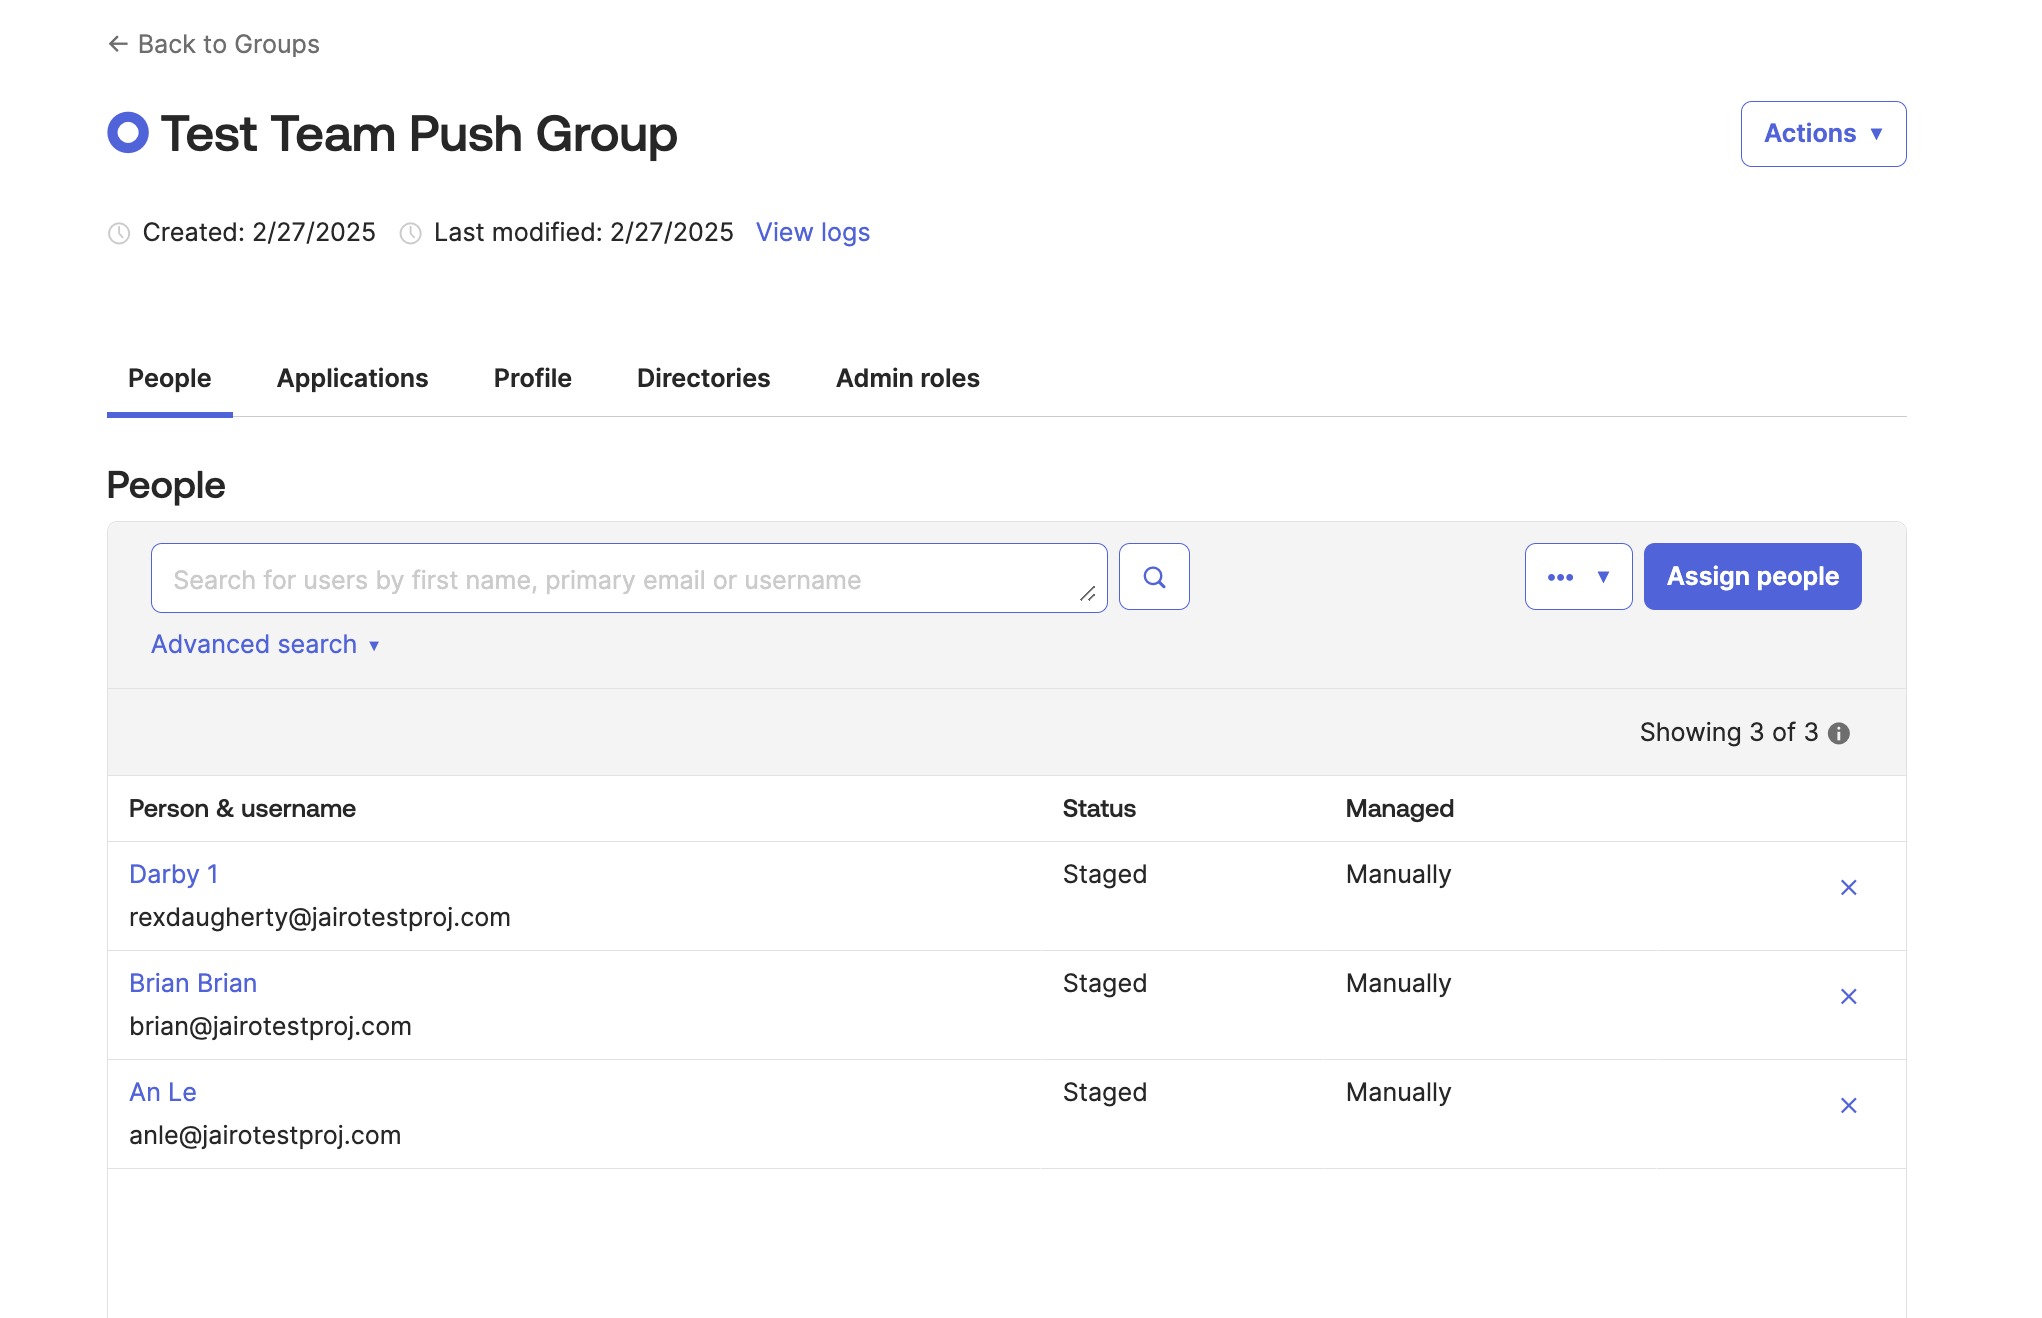
- To push a group of Okta users to a Statsig team, you must first create a mapping group.
- This group will contain the Okta members which will be part of the Team x Role Group.
Push Teams to Statsig
-
In Okta, go to the Statsig Integration’s “Push Teams” tab and select “Push Groups”. Then pick the mapping group created in the previous step.
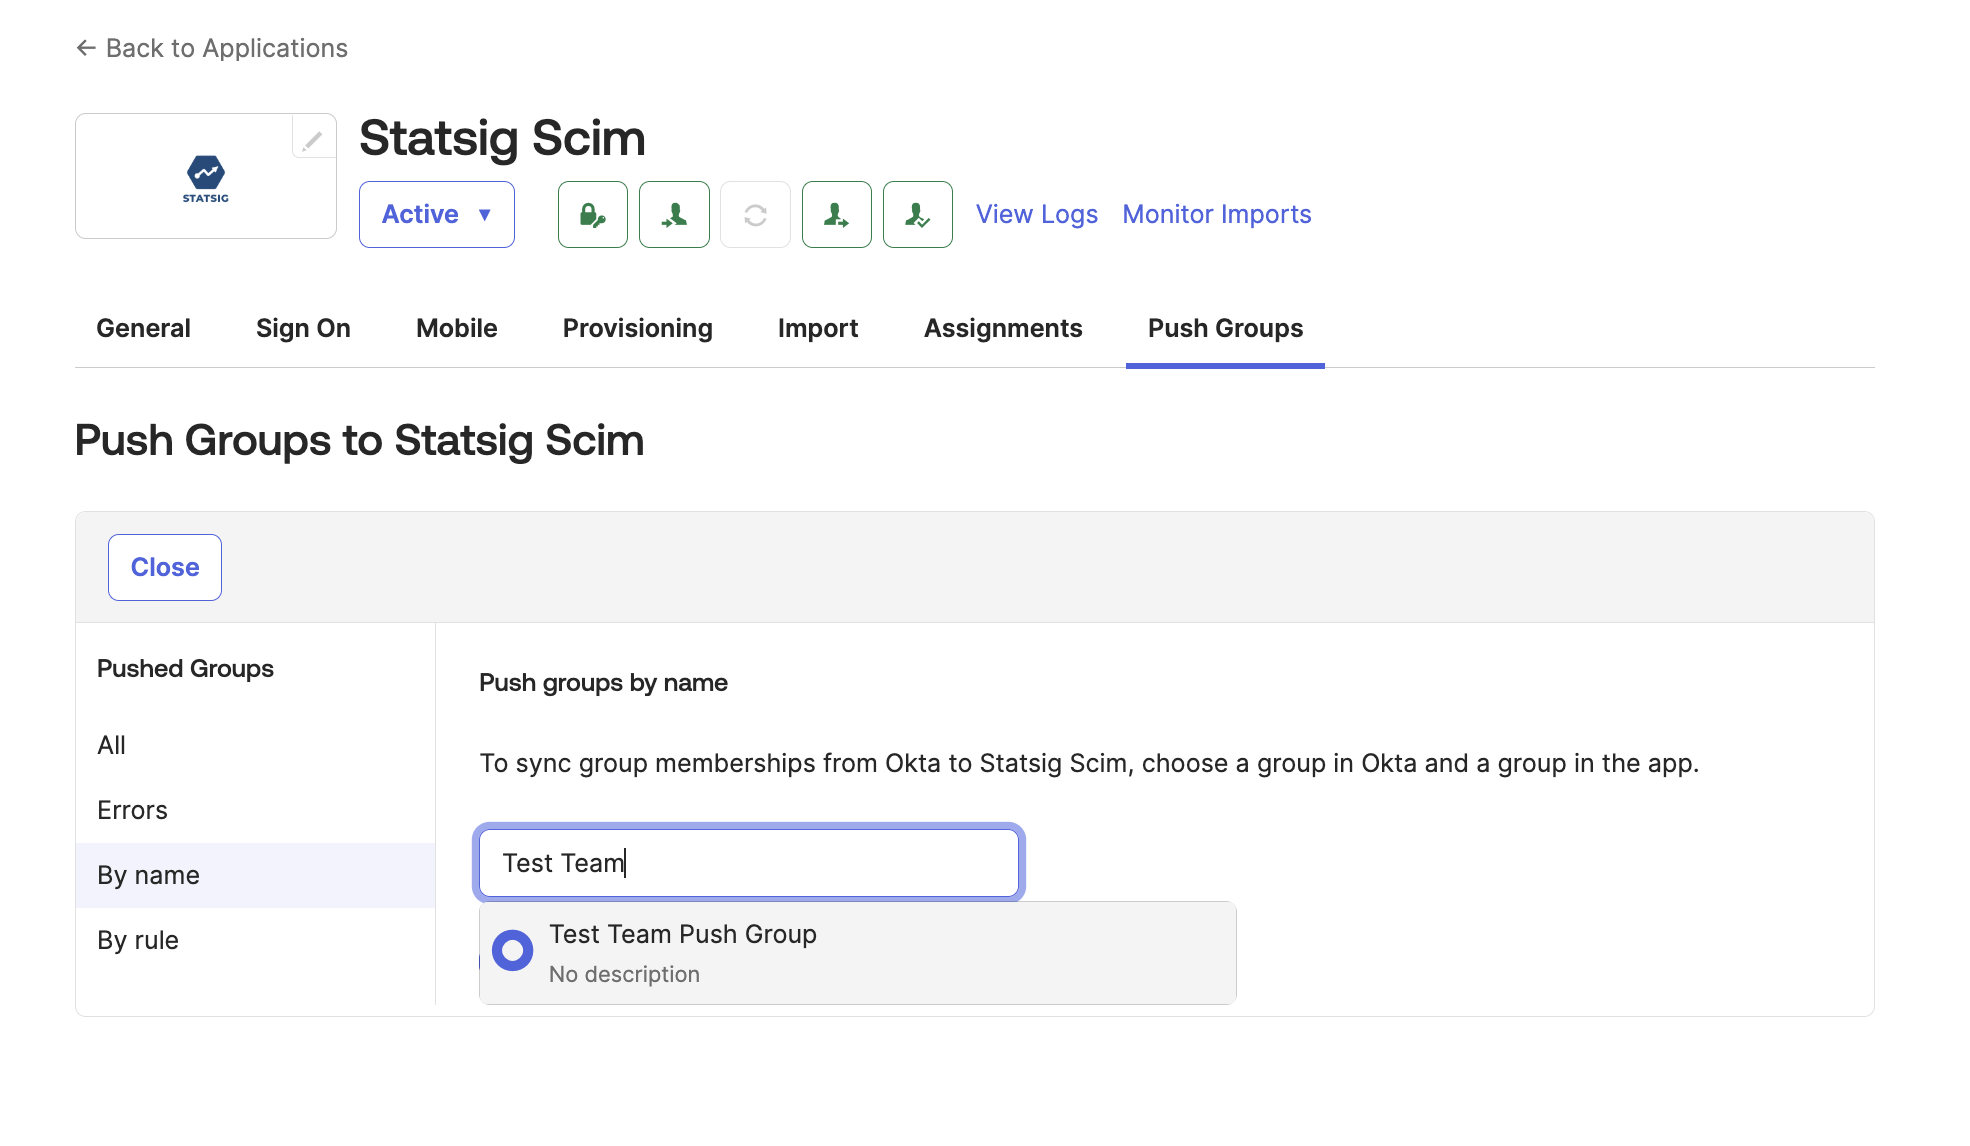
-
Change the Match result & push action to Link group. Then select the Statsig team you want to push to. It should follow the format
Statsig-ProjectName-TeamName-RoleName.
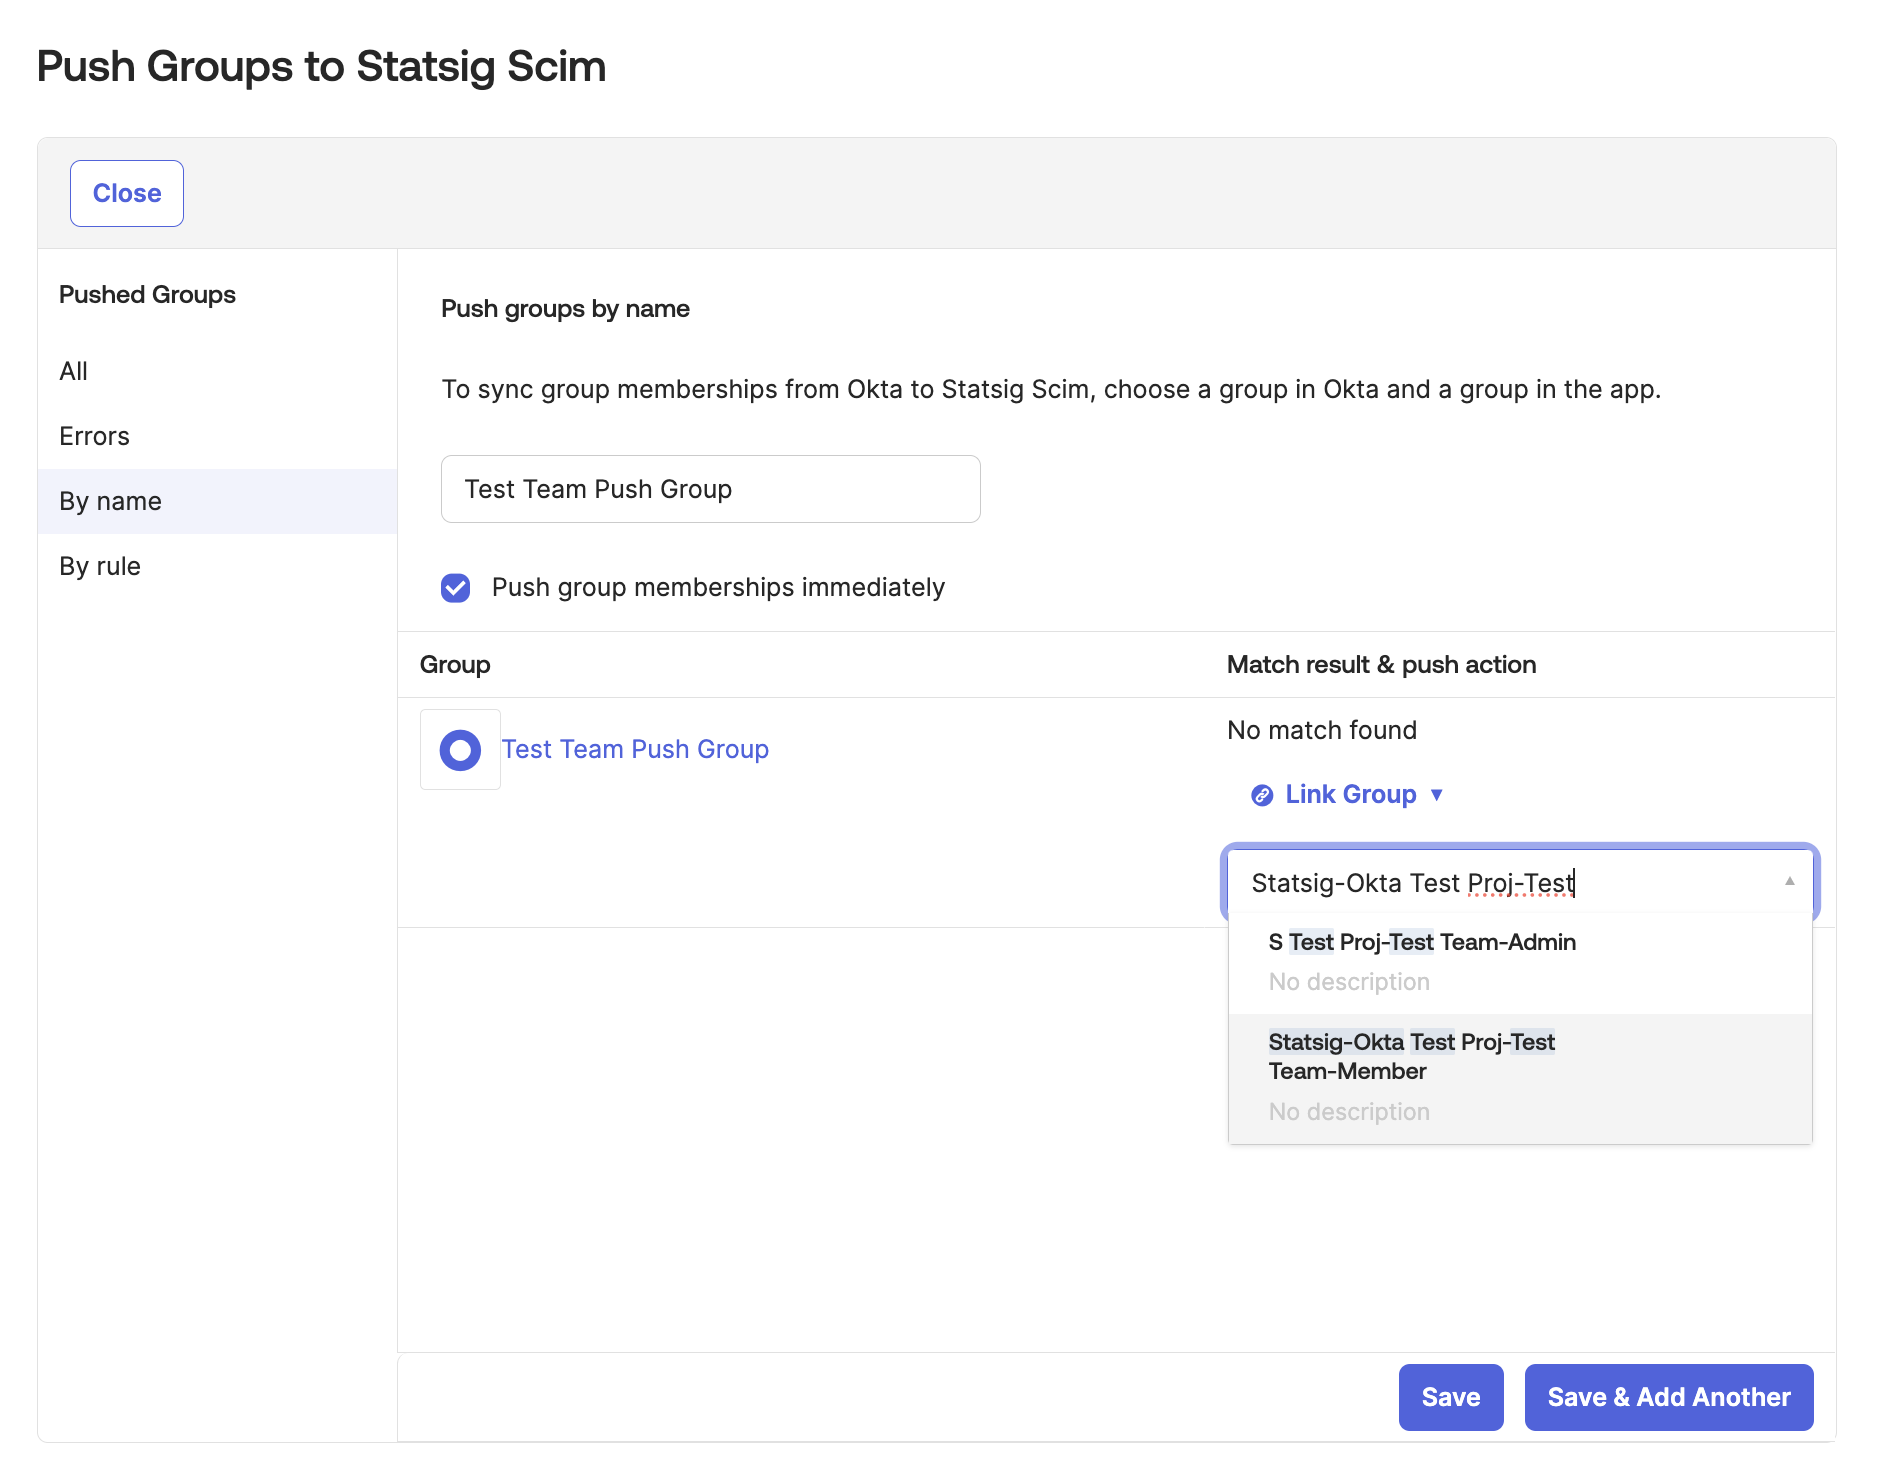
- When you are finished setting up the push, click “Save”.
Verify the Push
- Navigate to the Statsig Project and verify that the team has the new members.
- This could take some time for Okta to push the members to the team.

Delete the Team
- On Okta, navigate to push groups and find the pushed group that maps to the Statsig team.
- Click the push status section and select “Unlink Group”.
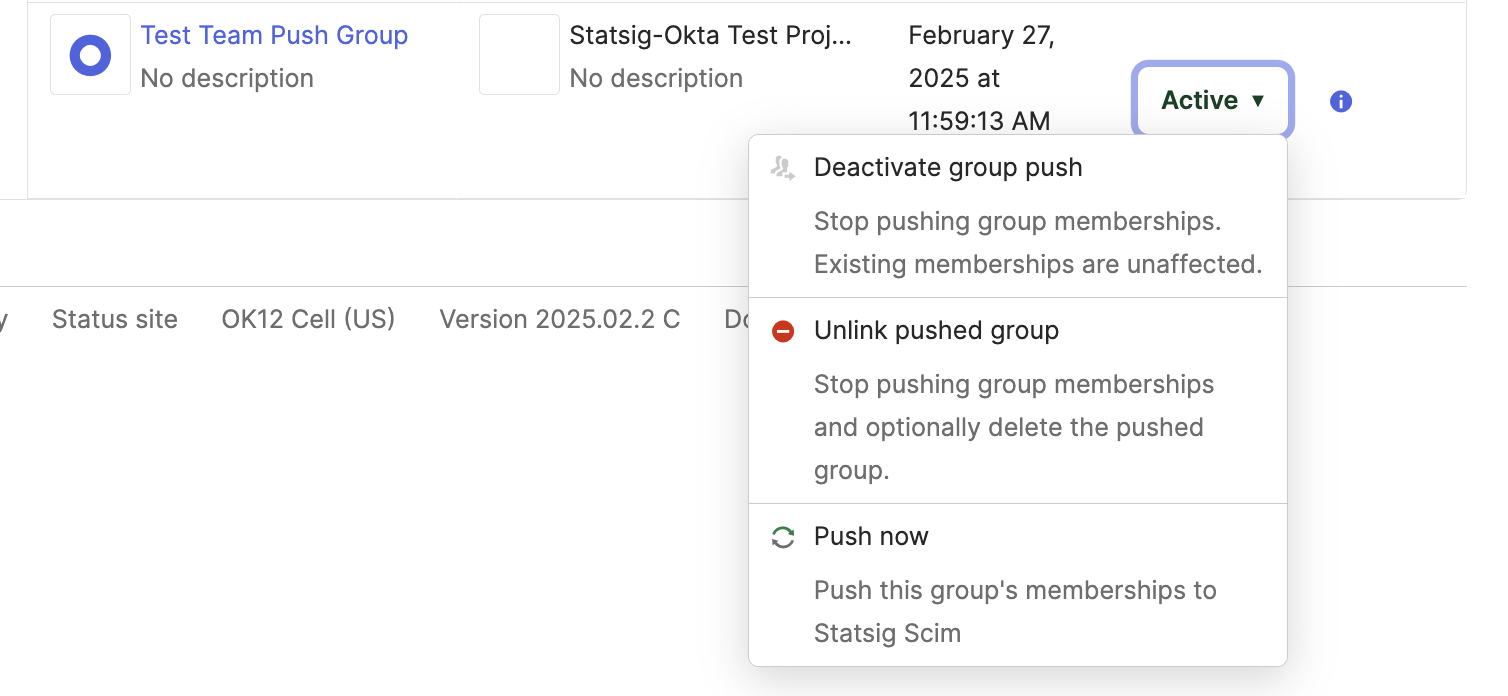
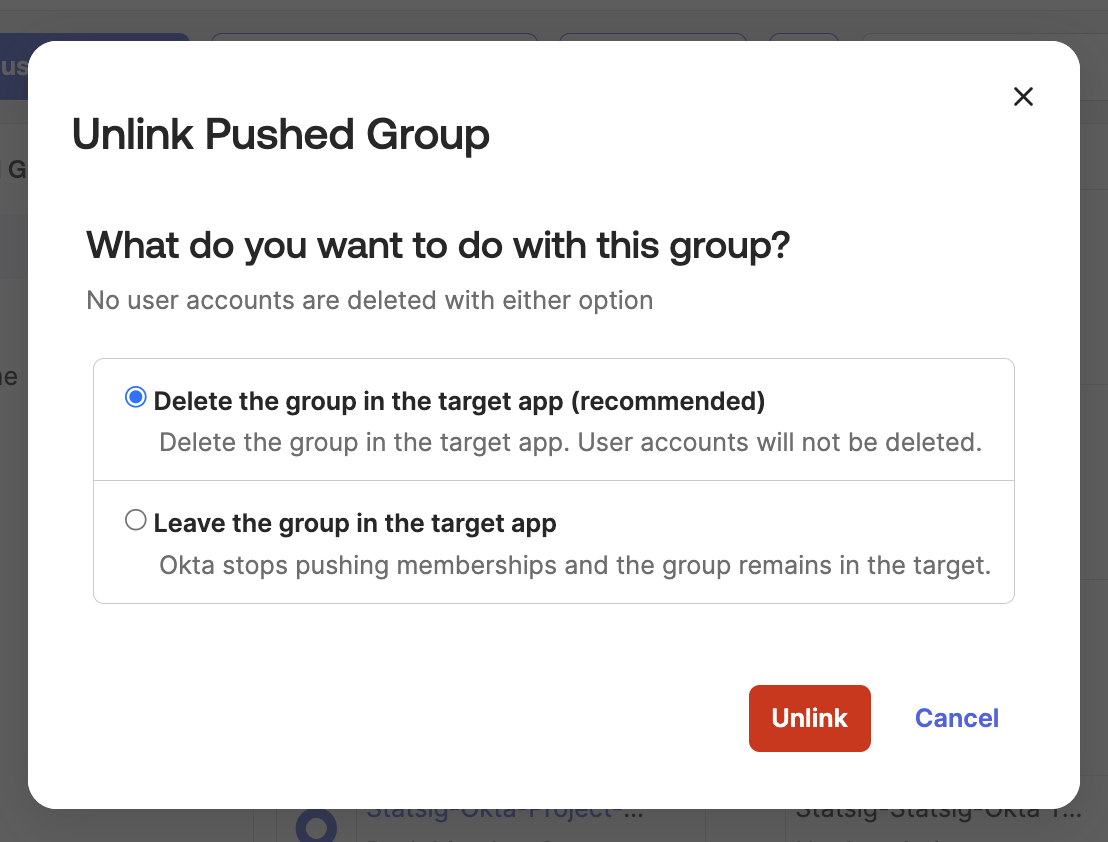
- When prompted to delete the group or leave it in the app, select “Delete”.
- After Okta pushes the deletion, the team should be deleted from Statsig. This may take a few minutes to complete.
Optional: Create a Team Via SCIM
- Find an existing Okta group with the members for a new Statsig Team.
- Navigate to Push Groups and Select “Push Groups”.
- Select the group you want to push to Statsig.
- Change the Match result & push action to Create Group.
- The naming for this group must match the format
Statsig-ProjectName-TeamName-Member.
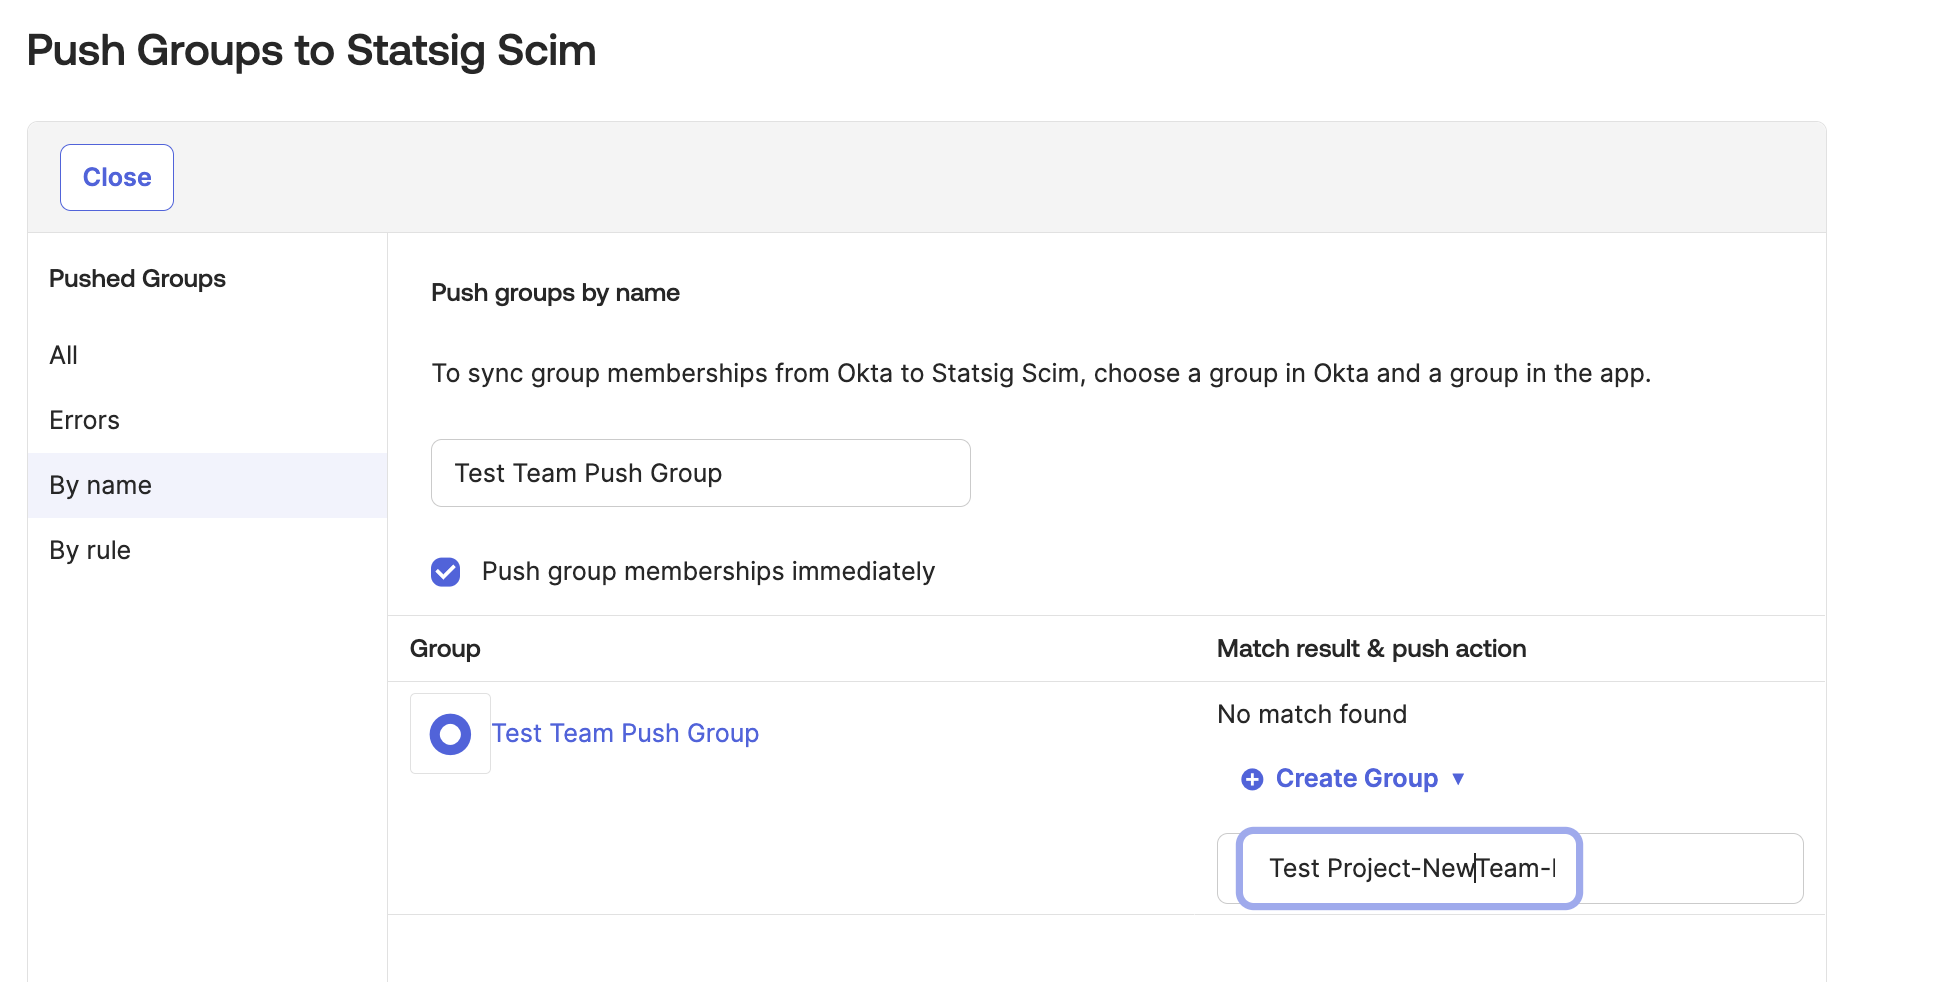
- When you are finished setting up the push, click “Save”.
- Afterwards, you should see the new team in the Statsig Project you specified.